Rollo Printers - Setting up a Custom Label Size
If your Rollo is printing FNSKUs across multiple labels or in the wrong orientation when using Boxem Print, setting up a custom label size should fix this issue. Just find your printer and OS below and follow the steps!
USB Rollo Printer (non-wireless)
Mac
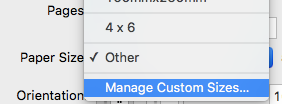
Click Manage Custom Sizes next to Paper Size in your Print Prompt menu.
In the next window, enter your paper size and margins and click OK. You can rename your new label size by double-clicking the highlighted item on the left.
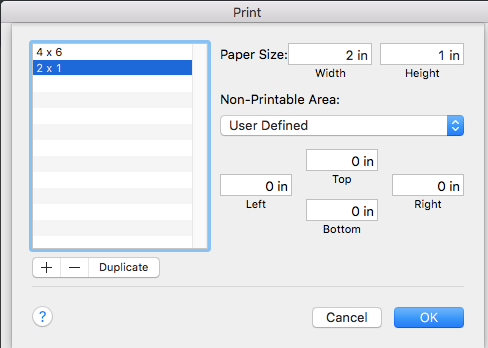
Once done, make sure the label size selected in Boxem matches the custom label size, then try printing once more. If it prints correctly, you're all set!
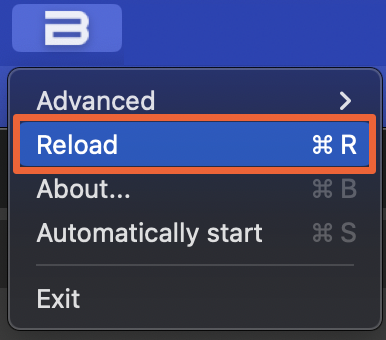
Note: After creating a custom size, you may need to refresh your browser and reload Boxem Print so the application can get the most up-to-date sizes available. To reload Boxem Print, right-click the “B” icon in your top menu bar and select “Reload” from the menu.
Windows
Navigate to your Control Panel > Hardware and Sound > Devices and printers > Printers and scanners.
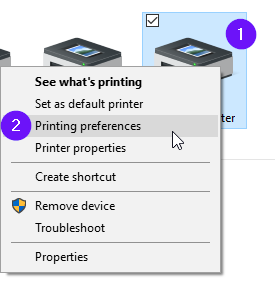
1. Right-click on the Rollo printer.
2. Click Printing preferences.
3. Click Settings.
4. Create a custom label size by entering a name for it in the Form name field.
5. Enter the width of the label in millimeters.
6. Enter the height of the label in millimeters.
7. Click Save.
8. Make sure your new label is selected in the list, and click Apply.

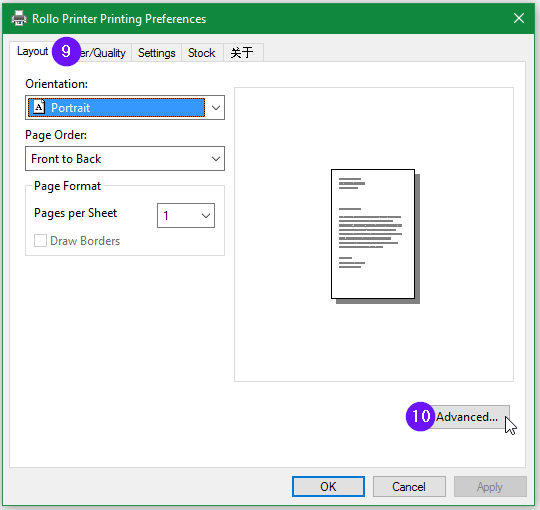
9. Click Layout.
10. Click Advanced.
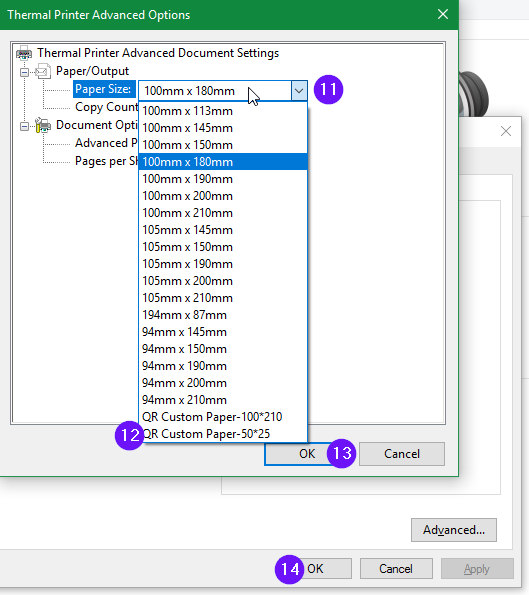
11. Click the arrow next to Paper Size to display a dropdown menu
12. Select the new custom label you just created from the list.
13. Click OK.
14. Click OK again in the main Printer Preferences window.
Once done, make sure the label size selected in Boxem matches the custom label size, then try printing once more. If it prints correctly, you're all set!
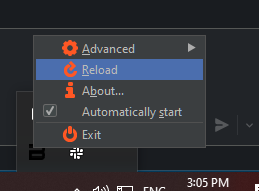
Note: After creating a custom size, you may need to refresh your browser and reload Boxem Print so the application can get the most up-to-date sizes available. To reload Boxem Print, right-click the “B” icon in your system tray and select “Reload” from the menu.
Rollo Printer (wireless)
To create a custom label size for you wireless Rollo pinter, you'll need to access the Rollo Printer Portal.
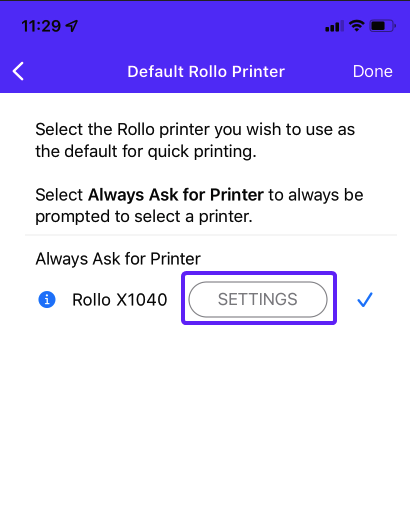
To begin, ensure you are on the same Wi-Fi network as your printer. Then, open the Rollo App and navigate to the Menu > Rollo Printer > Default Rollo Printer > Settings.
Once the Rollo Printer Portal opens, click Media and choose the desired label or create a new custom size.
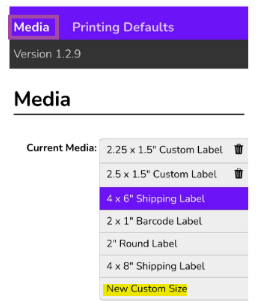
Click Save Changes.
Once done, make sure the label size selected in Boxem matches the custom label size, then try printing once more. If it prints correctly, you're all set!
Note: After creating a custom size, you may need to refresh your browser and reload Boxem Print so the application can get the most up-to-date sizes available. To reload Boxem Print, right-click the “B” icon in your system tray (Windows) or top menu bar (Mac) and select “Reload” from the menu.

